
")
About pattern
Skill level: Beginner / Intermediate
Start making the body, then the tail, and finish with the head, this is a whole piece. Make separate wings, beak, legs, and sew them at the end of the work.
This pattern is written in American terms:
ch – chain stitch
sl st – slip stitch
sc – single crochet
invdec -invisible decrease (2 sc together)
inc – increase (2 sc in one stitch)
FLO – crochet through the front loop only
BLO – crochet through the back loop only
(…)* – repeat the space in brackets the given number of times
st/sts – stitch/stitches
FO invisibly (Fasten off invisibly) – insert the end of yarn into a tapestry needle, then insert the needle into the front loop of each st of the last round, pull tight to close the hole, and weave in the yarn end.
Body, tail, head
Start making a body. Use yellow color.
RND 1: 6 sc in MR (6)
RND 2: 6 inc (12)
RND 3: (1 sc, 1 inc)*6 (18)
Place stitch marker.
RND 4: (2 sc, 1 inc)*6 (24)
RND 5: (3 sc, 1 inc)*6 (30)
RND 6: (4 sc, 1 inc)*6 (36)
RND 7: (5 sc, 1 inc)*6 (42)
RND 8: (6 sc, 1 inc)*6 (48)
RND 9: (7 sc, 1 inc)*6 (54)
RND 10: (8 sc, 1 inc)*6 (60)
RND 11: (9 sc, 1 inc)*6 (66)
RND 12-21 (10 rounds): 66 sc (66)
RND 22: 56 sc, place here additional stitch marker, 10 sc (66)
RND 23: 10 sc, skip the rest of sts, join with st on the other side where you placed the additional stitch marker, remove it, and make 1 sc, then 9 sc (20)
RND 24: continue crocheting a small round, follow the first stitch marker of the body, make 20 sc (20)
RND 25: (2 sc, 1 invdec)*5 (15)
RND 26: 15 sc (15)
RND 27: (1 sc, 1 invdec)*5 (10)
RND 28: 5 invdec, FO invisibly, cut yarn, weave in end (5)
Flatten the body and make back: join the yellow color, insert your hook in 2 sts near the tail and make through both layers to close the back 5 sl sts.
Crochet sts of the first layer through FLO and the second back layer through BLO so that there is no large, raised seam.
Head
RND 23: place stitch marker, continue crocheting the big round, and make 36 sc (36)
RND 24-27 (4 rounds): 36 sc (36)
Stuff the tail and the half of the body.
RND 28: (4 sc, 1 invdec)*6 (30)
Insert safety eyes 8 mm between rounds 21-22, 5 sts apart when not inserted (3 sts when already secured with washers. Stuff it.
RND 29: (3 sc, 1 invdec)*6 (24)
RND 30: (2 sc, 1 invdec)*6 (18)
RND 31: (1 sc, 1 invdec)*6 (12)
RND 32: 6 invdec, FO invisibly, cut yarn, weave in end (6)
If you see the hole between the tail and the body, you can sew it.
When you finished the head, you can cut some strands and make a little crest on the top of the head.
Beak
Use orange yarn.
RND 1: 5 sc in MR (5)
RND 2: 1 inc, 4 sc (6)
RND 3: 1 inc, 1 sc, skip the rest of st, FO, cut yarn, leaving a tail for sewing. Sew it between eyes.

Wing (2 pc)
Use yellow yarn.
RND 1: 6 sc in MR (6)
Row 2: 5 inc, skip the last st, turn (10)
Row 3: 1 ch, work in 1st st from your hook, 4 sc, 1 inc, 4 sc, turn (10)
RND 4: 1 ch, work in 1st st, 4 sc, 2 inc, 4 sc, continue crocheting, 1 ch, 1 sc in the same st, 5 sl st, FO, cut yarn for the 1st wing, leaving a long tail for sewing for 1 wing. Cut yarn for the 2nd one and weave in end, sew it to the body at the other edge of the wing, and sew with an extra piece of yarn.
Sew them between rounds 17-18 in diagonal.
Leg (2 pc)
Use orange yarn.
Row 1: (4 ch, crochet on the chain, work in 1st ch st, 3 sl st)*3, 1 sl st into the 1st ch of the 1st finger, tighten st and cut yarn, leaving a tail for sewing (pictures 17-21). Sew legs between rounds 3-5 on the front side of the body.
You are done! Congratulations!
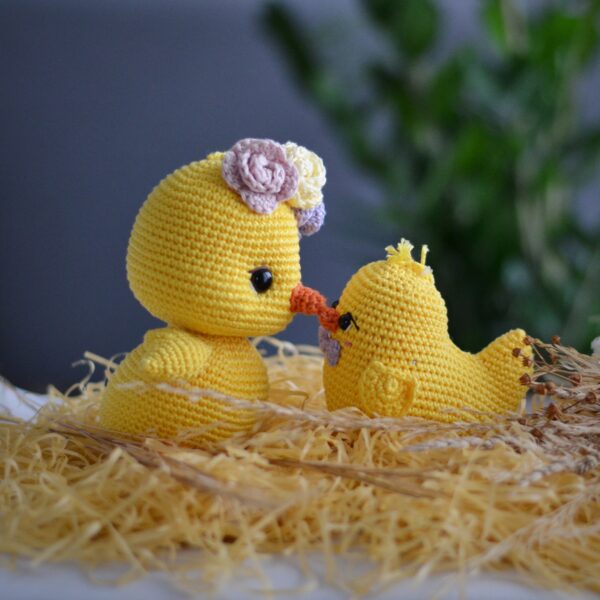
I hope you like the chick crochet pattern.
Please, share the picture of your finished pumpkin on my:
– Facebook page or Instagram, please tag me #lacigognefr (@lacigogne.crochet)
or
– Pinterest. You can also add a picture. Link to the pin here.
Thank you for making the chick with me!